Short answer: A bootable Windows 11 USB on Mac needs three things. The free ISO from Microsoft, a stick of 8 GB or more, and Terminal. Erase the stick as FAT32 with MBR. Copy the ISO files except install.wim, then split that file with wimlib. Apple silicon Macs can't boot it. A PC can.
A bootable Windows 11 USB on Mac takes the Windows 11 ISO from Microsoft, a USB stick of 8 GB or more, and Terminal. Format the stick as FAT32, copy the ISO files across, then split the one file that is too big for FAT32. No paid app needed.
- Download the Windows 11 ISO for x64 from Microsoft’s download page.
- Plug in the stick. Find its disk number with diskutil.
- Erase it as MS-DOS FAT with a Master Boot Record scheme.
- Mount the ISO and copy everything except install.wim.
- Split install.wim into pieces under 4 GB with wimlib.
- Eject. Boot the target PC from the stick.
What you need before you start
Short list. Nothing here costs money:
- A USB flash drive of at least 8 GB. Everything on it gets erased, so copy off anything you want to keep.
- The Windows 11 disk image. Free, straight from Microsoft.
- Free space on the Mac for the ISO. It runs to several gigabytes.
- Terminal, already in Applications > Utilities.
- Homebrew, a free package manager for macOS. We use it for one small tool.
- A product key or a digital license for the PC that will run Windows. Not needed to build the stick.
Pick the right image. The page has three options. Only the third one works on a Mac, the one called Download Windows 11 Disk Image for x64 devices. Choose the edition, the language, then 64-bit Download. The links stay valid for 24 hours, so we’d start the download right away. It’s a multi-edition ISO. Your product key picks Home or Pro later, during setup.
Get it from the official Windows 11 download page. Nowhere else. A modified image from a random mirror is the last thing we’d put on a machine that holds your files.
Why the Media Creation Tool won’t run on a Mac
It’s a Windows program. On a Windows PC the Windows 11 Media Creation Tool does the whole job in a few clicks, and it needs a Windows session with admin rights to run. macOS just can’t open it.
Boot Camp Assistant won’t save you either. Apple’s Boot Camp page covers Windows 10 on Intel Macs. Apple silicon has no Boot Camp at all. So Terminal it is. Got a Windows PC around, even a borrowed one? Then we’d use the tool there, it’s quicker, and our guide to installing Windows 11 from USB walks through that route.
Make a bootable Windows 11 USB on Mac with Terminal
A handful of commands, one at a time. Read each one before pressing Return. Plug in the stick first, then list the disks:
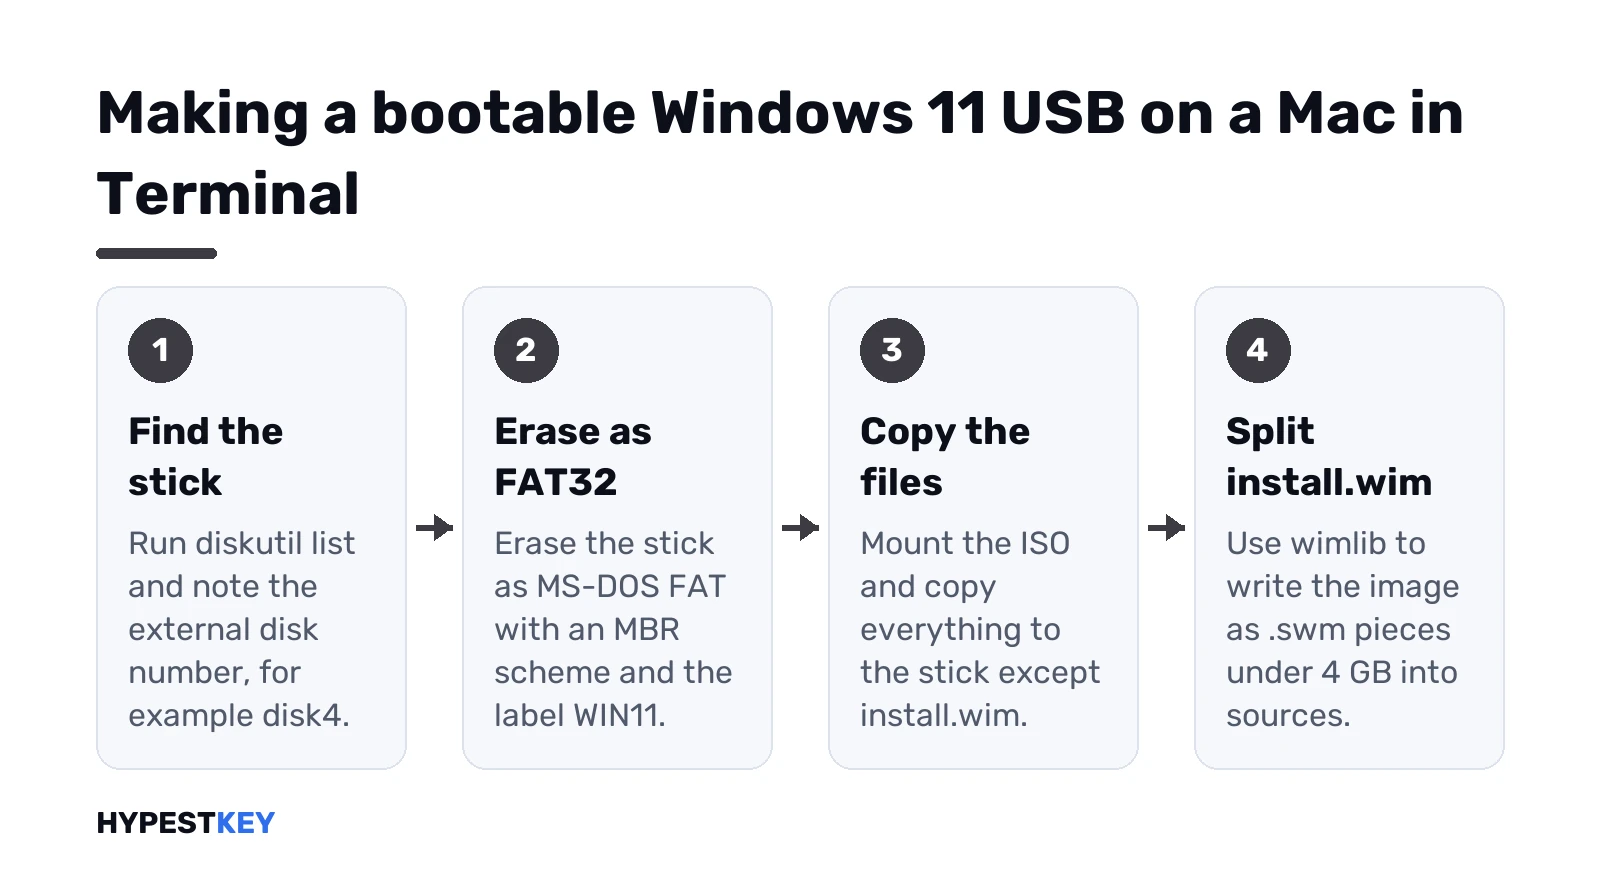
diskutil listLook for a line marked external, physical. Size matches your stick? In our example it’s disk4. Yours may differ. The wrong number erases the wrong drive, so we’d check twice. The Mac’s own disk is usually disk0 or disk1.
Erase the stick as FAT32 with a Master Boot Record scheme. The name WIN11 is just a label:
diskutil eraseDisk MS-DOS "WIN11" MBR disk4Now mount the ISO. Double-clicking it in Finder works too. The Terminal way:
hdiutil mount ~/Downloads/Win11_English_x64.isoYour file name will be a little different. Type the start, press Tab. The mounted image shows up under /Volumes, with a name such as CCCOMA_X64FRE_EN-US_DV9. To see the exact name:
ls /VolumesCopy everything to the stick except the one big file. Swap in your volume name:
rsync -vha --exclude=sources/install.wim /Volumes/CCCOMA_X64FRE_EN-US_DV9/ /Volumes/WIN11That takes a few minutes. The trailing slash after the ISO name matters. Without it, rsync puts a whole folder inside the stick instead of the files themselves.
The 4 GB limit: splitting install.wim
FAT32 can’t hold a file over 4 GB. And install.wim in a current ISO is bigger. Why not just use exFAT then? Many UEFI PCs only boot from FAT32. Microsoft’s deployment docs say so too. Their fix: split the image into smaller .swm files.
On a Mac the splitting tool is wimlib, free and open source. Install Homebrew first if you don’t have it, using the one-line command on brew.sh. Then:
brew install wimlibAnd the split itself, straight onto the stick:
wimlib-imagex split /Volumes/CCCOMA_X64FRE_EN-US_DV9/sources/install.wim /Volumes/WIN11/sources/install.swm 3800The number is the largest piece in megabytes. Anything safely under 4000 does it. You end up with install.swm and install2.swm. Both sit in the sources folder of the stick. Windows Setup reads split files from there by itself.
Finished? Eject the stick before you pull it:
diskutil eject disk4Free apps that do the same thing
Not keen on Terminal? There are free macOS apps that wrap these exact steps in a window. Same result, a FAT32 stick with a split image. We stick with the commands above because every step is visible and nothing gets installed beyond wimlib.
Avoid tools that promise a patched Windows or skip activation. Those images aren’t from Microsoft. Another trap: the old dd method. It writes the ISO byte for byte. A Windows ISO isn’t built for that, so we’d expect a stick that won’t boot on a UEFI PC.
Booting from the Windows 11 USB
Plug the stick into the PC that will get Windows. Turn it on and press the boot menu key right away. It depends on the maker. F12, F11, F9 and Esc are common ones. The key is often shown on the first logo screen.
Pick the entry that says UEFI and the stick’s name. Setup starts with the language screen. From there it’s a normal install, the same one we cover in our Windows 11 clean install guide.
Before you start, check the PC itself. Windows 11 wants TPM 2.0 and Secure Boot. We show where those switches live in our pages on TPM 2.0 and turning on Secure Boot. Full list? See our Windows 11 requirements page.
Stick not showing up at all? Then we’d open the BIOS setup screen and look for the boot order list. Our page on installing from USB through the BIOS covers those menus. Same menus for Windows 11.
Windows 11 on an Apple silicon Mac: the USB won’t boot there
This one surprises people. An M-series Mac can’t boot Windows from USB. Not this stick, not any. Microsoft’s support page for these Macs names two routes only. First, a Windows 365 Cloud PC. Second, the Arm version of Windows 11 inside Parallels Desktop.
So the stick from this page is for a PC. Want Windows on the Mac itself? Then you’d want a virtual machine. Our page on a Windows virtual machine on Mac compares the options. Intel Macs too? Our guide to installing Windows 11 on a Mac has them. One handy detail from Microsoft: a Windows 11 Pro key works for both the x64 and the Arm version.
Windows 11 recovery USB: what a Mac can and can’t make
Different thing, same stick shape. A recovery drive comes from the Recovery Drive app inside Windows. File name recoverydrive.exe. It backs up system files from that PC, for a reset later. macOS has no way to build one.
The good news: the install stick you just made can do most of the rescue work. Boot the broken PC from it. Pick your language, Next, then Repair my PC. That opens the Windows Recovery Environment with these tools:
- Startup Repair, for a PC stuck before the desktop.
- Uninstall Updates, when a fresh update broke something.
- System Restore, back to an earlier restore point.
- Reset this PC, with or without your files.
- Command Prompt, for manual fixes.
- UEFI Firmware Settings, to reach boot order and Secure Boot.
Microsoft’s Windows Recovery Environment page describes this exact route. Once the PC works again, we’d make a real recovery drive on it, on a spare stick. Our pages on Windows 11 Safe Mode and a factory reset of Windows 11 help with the next steps.
When the stick won’t boot or setup stops
A few usual suspects:
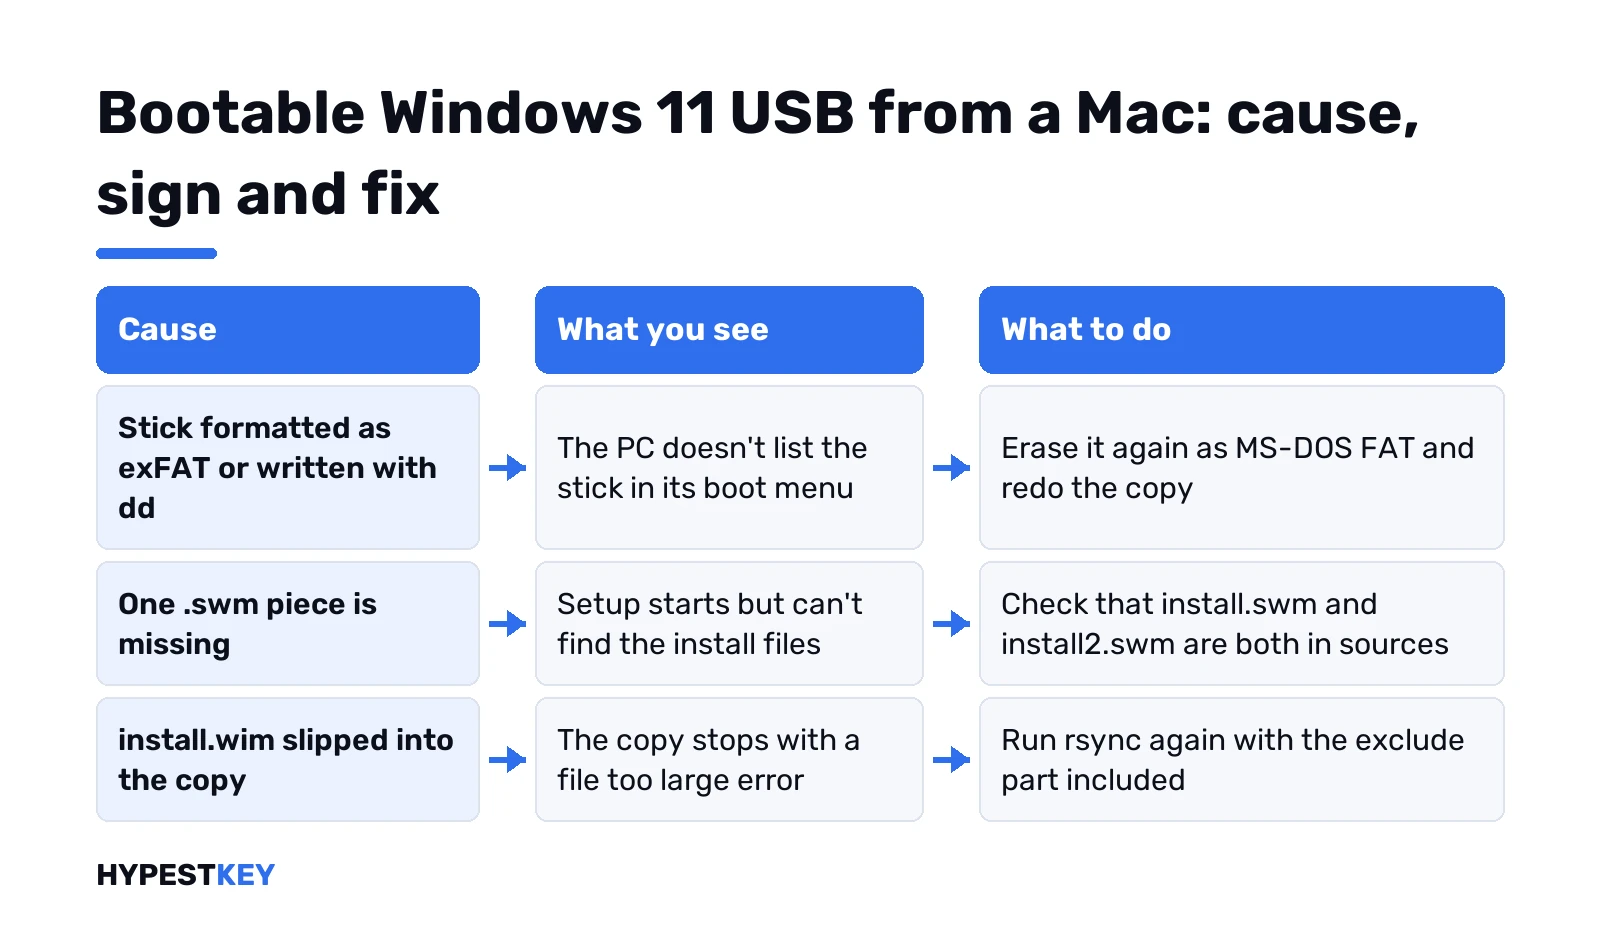
- Stick not in the boot menu. It was formatted as exFAT or written with dd. Redo the erase step as MS-DOS FAT.
- Setup can’t find install files. One of the .swm pieces didn’t get copied. Check the sources folder for both.
- Copy fails with a file too large error. install.wim slipped into the copy. Rerun rsync with the exclude part.
- This PC can’t run Windows 11. TPM or Secure Boot is off in the firmware, or the CPU isn’t on the list.
- Resource busy when erasing. Something on the Mac still has the stick open. Close Finder windows and try again.
Still stuck? A cheap stick from a drawer fails more often than you’d think. We’d try a different one before anything else.
After setup: product key and activation
The ISO holds every edition. The key decides which one you get. Type it during setup, or later on the Activation page in Settings. Our step-by-step for activating Windows 11 covers both keys and digital licenses.
Reinstalling on a PC that was already activated? Skip the key. It usually picks up its digital license once it’s online. New build with no license? We sell a Retail Windows 11 Pro key, emailed instantly after payment.
FAQ
Can a Mac make a Windows 11 bootable USB without extra software?
Almost. Terminal handles the format and the copy, but the big install.wim file needs wimlib to split it.
Why not just copy the ISO files to an exFAT stick?
Because many UEFI PCs only boot from FAT32. FAT32 has a 4 GB file limit, which is why the split exists.
Will the USB boot my M1 or M2 MacBook?
Nope. Apple silicon Macs don't boot Windows from USB. Use a virtual machine or a Windows 365 Cloud PC there.
How big does the USB stick need to be?
At least 8 GB, the size Microsoft asks for. Every file already on it gets erased.
Can I create a Windows 11 recovery drive on a Mac?
No. The Recovery Drive app runs only in Windows. The install stick still opens Repair my PC and the recovery tools.
Do I need a product key to build the stick?
Not for the stick. The key comes in during setup or later, and a PC with a digital license may not need one.
Does the Media Creation Tool work on macOS?
No, it only runs on Windows. On a Mac, download the ISO version from the same Microsoft page.